Ice Dam | Temporary Heat Tape
- Category: Ice Dams
- Written by Administrator
A simple solution to temporarily relieve roof leaks due to ice dams.
When water is running down the interior walls of your kitchen, and you are wringing water soaked towels into the sink, the last thing you may be thinking about is long term ice dam prevention.
You want the water to stop and you want it to stop now!
So you call a roofer for help and he is happy to remove the snow from your roof and maybe even attempt to remove the ice in the gutter as well. If he is a good roofer he will explain the causes and remedies available to prevent future ice dams and may even investigate the attic to find the cause of the ice dam. He gives you a bill for the snow removal service and is on his way.
Three days later, another snow storm. A couple days of the ice dam freeze/thaw cycle and water is once again running down the walls of the kitchen and you have the buckets and towels out. Another call to the roofer. The snow is removed. And the cycle starts again.
Instead of having your roofer on speed dial, and signing up for a weekly subscription for snow removal, a longer lasting ice dam protection solution can be achieved with the use of roof and gutter heat tape.
Heat Tape - De icing Cables - Gutter Heat Wires - Snow Melt Tape all common names for low voltage wires that attach to the lower edge of the roof and gutter to melt snow and ice accumulation.
Instead of wasting hours shoveling snow and chipping ice, strategic placement of these heat tapes can relieve existing ice damming and prevent further leaks due to ice dams.
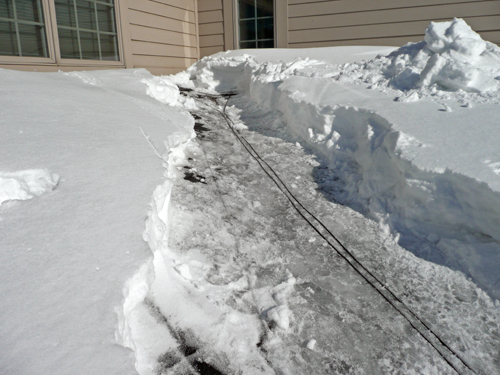
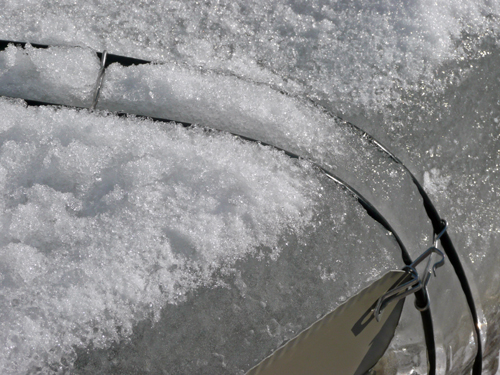
After removing the heavy snow from the affected area, being careful not to dig too deep and damage the roofing shingles, a small area near the top of the valley is carefully cleaned of remaining snow so a cable clip or two can be secured to the shingles. These clips hook to the bottom edge of the shingles with small barbs on a u-shaped tab. Another small hooked tab holds the heat tape.
Hopefully there is an electrical outlet near the affected roof area. Plug the heat tape in to the outlet, with enough slack to leave a drip loop near the outlet, and run the heat tape up onto the roof. Place the wire in the lowest spot, usually the bottom of the valley and the deepest pool of water. Run the wire up to the cleared area and secure to the shingle clips, and then back in a loop using the supplied clips to hook the heat tape to itself. Run the end of the heat tape over the edge of the roof following itself down near the electrical outlet and then to the ground.
The heat tape will melt a channel through the snow and ice and in a short time the built up pool of water will drain off the roof.
The next time the snow falls, the heat tape will allow the melting snow to continue to run off the roof without building up into a major ice dam. Though there will still be ice in the gutter until the weather warms. After the gutters are clear of ice the heat cable can be re-positioned to run along the gutter and down the downspout. And of course the cause of the ice dam can be determined, and resolved.